Automation in Customer Azure Tenant (CAT)
Note, this is not supported beyond specific enterprise customers who pay for this service.
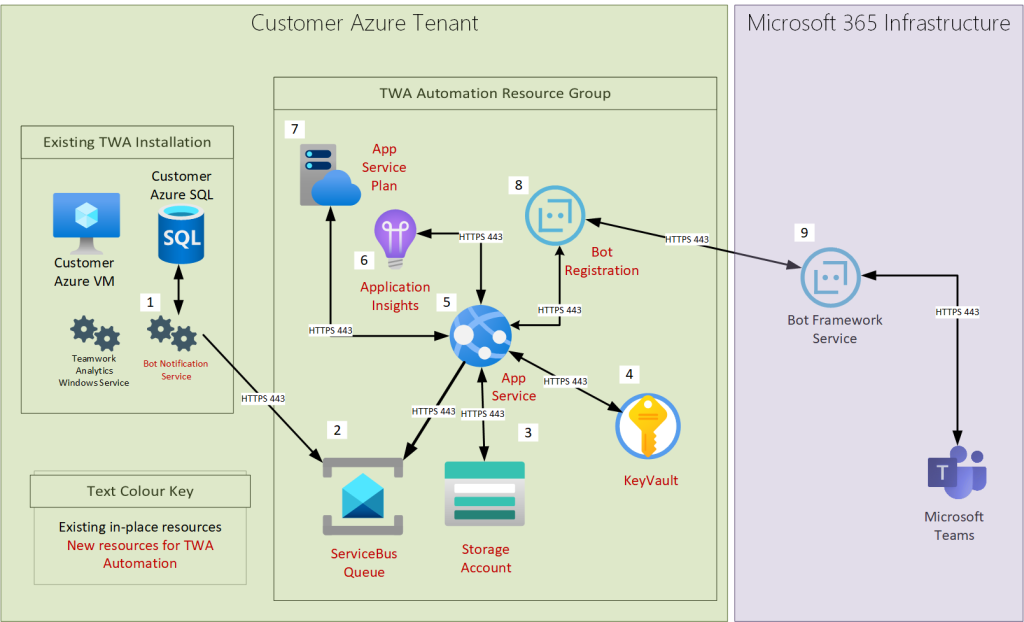
This page describes the architecture required for hosting TWA Automation in CAT Configuration. In this configuration, the Nasstar / Modality-managed cloud solution that brokers and delivers messages to users is replicated within a customer’s own Azure tenant.
Important: because this configuration results in all parts of the TWA Automation service being hosted within a customer’s Azure tenant, the customer assumes responsibility for monitoring of the service and raising any issues with Nasstar / Modality for investigation. It may be necessary to export log files or temporarily provide access to installed components for troubleshooting.
NOTE: Teamwork Automation cannot be used against a TWA database that has been enabled for PII anonymisation.
Required Components
The following Azure resources are required to install TWA Automation:
- 1 x Bot Registration S1 Standard
- 1 x App Service Plan S1
- 1 x App Service
- 1 x Application Insights
- 1 x Storage Account General Purpose v2 Hot
- 1 x Service Bus Queue
Required Configuration Settings
As part of the setup process, the following configurations will be applied. These are required for the TWA Automation service to operate. The ARM Template deployment will configure these settings automatically; this list is provided for reference:
| Service Description | |
|---|---|
| 1 | The Bot Notification service is an additional component that gets installed on an existing TWA deployment. It runs as scheduled tasks that looks at the TWA Database for defined scenarios to pass to the TWA Automation service. |
| 2 | Jobs are placed on the ServiceBus Queue by the Bot Notification Service. These jobs are then retrieved by the Automation Service. This process adds a layer of resilience to the TWA Automation Service. |
| 3 | A storage account is used for holding configuration values which are consumed by the TWA Automation Service. |
| 4 | Connection Strings and Secrets that are used by the solution are stored here. Through the use of Azure Managed Identity, only code running on the App Service have access and only when required. |
| 5 | An App Service is essentially an IIS Web Server but presented as a PaaS solution. This is used to run Nasstar / Modality’s TWA Automation Service |
| 6 | Application Insights is where the App Service stores logs and metrics for the health of the solution. To assist with Nasstar / Modality’s ability to resolve faults, it is recommended the leave the default option Logs to Modality to Yes which will mean that this component won’t get deployed |
| 7 | The App Service Plan defines the capabilities and cost of the App Service and can be scaled up or down as required. |
| 8 | A Bot Registration contains the configuration necessary for the TWA Automation Service to be able to send messages through Microsoft Bot Framework Service |
| 9 | Microsoft host a central Bot Framework Service that allows Nasstar / Modality’s TWA Automation Service to function |
Installation Instructions
Azure ARM Template is our preferred installation and configuration method. The instructions below are for an ARM Template deployment.
Step 1 – Create Azure AD Application
TWA Automation requires a new Azure AD Application registration. Once created, you will provide the App ID and Secret to the ARM Template, which will perform the remainder of the configuration.
Register Teamwork Analytics with Azure Active Directory
- Sign in to the Azure Portal
- Select the Azure Active Directory service from the navigation pane on the left
- Select App Registrations and click New Registration (Take care not to select App Registrations (Legacy) as these instructions do not apply to them)
- Enter the following application registration details
- Name – must be Modality TWA Automation (this name is important for the application to work correctly)
- Supported Account Types – This should be set to Accounts in any organizational directory (Any Azure AD directory – Multitenant) Why?
- Redirect URI – not required
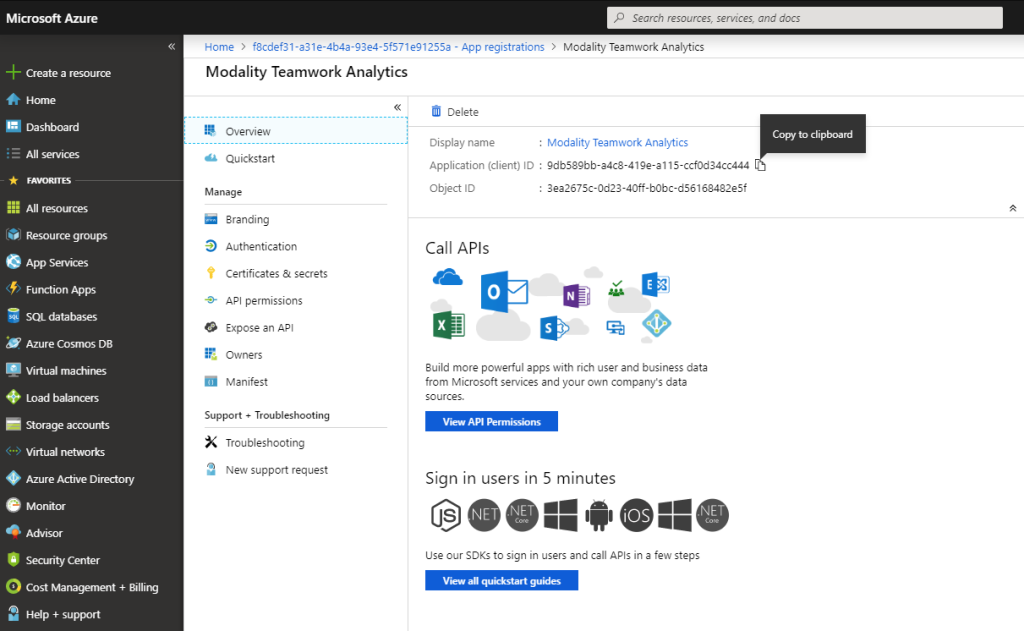
- Click Register and Azure AD will create an Application ID and present the Overview page
- Take note of the ApplicationID as this will be required further in the deployment process
Add a Client Secret
- Navigate to the Azure Active Directory from the navigation pane on the left
- Select App Registrations and select the Modality Teamwork Analytics app
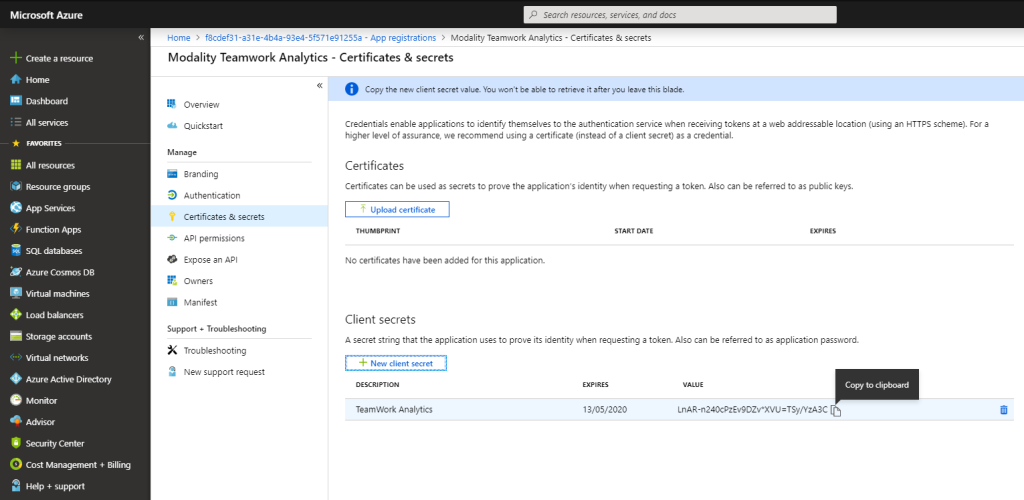
- Select Certificates & secrets from the Manage menu
- Select New client secret and enter an appropriate description and expiry period
- Description – Recommend setting this to TWA-Secret
- Expiry – Recommend setting this to Never
- Click Add
- Immediately take note of the Secret as this can not be retrieved later and will be required further in the deployment process
Declare API Permissions for Teamwork Automation
- Navigate to the Azure Active Directory from the navigation pane on the left
- Select App Registrations and select the Modality Teamwork Analytics app
- Select Api permissions from the Manage menu
- Find and select Microsoft Graph from the Request API permissions blade
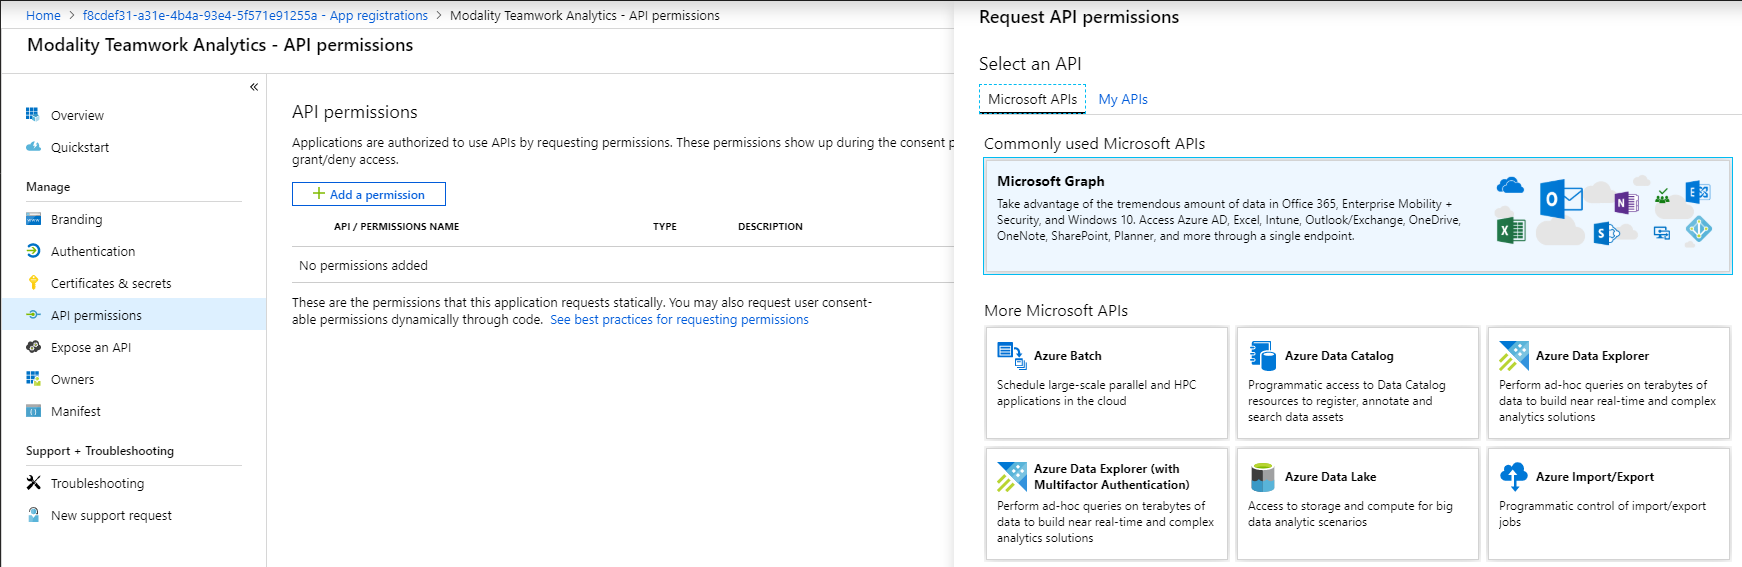
- Ensure that the permission type is set to “Application permissions” and not “Delegated permissions”
- Select the follow permission from Microsoft.Graph
- TeamsAppInstallation.ReadWriteSelfForUser.All
- Click Add permissions to be returned to the “API permissions” blade
- Click the Grant Admin Consent for Your Name button

Step 2 – Deploy Teamwork Automation
Teamwork Automation is provided as an Azure Resource Manager (ARM) template that automatically provisions and starts the required resources in your Azure subscription. Teamwork Analytics MUST already have been installed by using the InstallTWA.ps1 deployment script
Note: You must have registered an application beforehand. Provide the App ID and App Secret from Step 1.
Note: For an introduction to Azure Resource Manager see docs.microsoft.com.
Contact Nasstar / Modality for the latest version of InstallBOT.ps1, the PowerShell script is version stamped and will install the version of Teamwork Analytics that matches the download. It uses output from InstallTWA.ps1 so MUST be run from the same location.
Each script is signed and will require an Administrative PowerShell window and the following PowerShell module to be installed before attempting to run the scripts:
They will also need to be able to access the internet so if you are running the scripts from behind a web proxy then this will need to be configured. First off run the PowerShell script by typing the name of the script from the script directory.
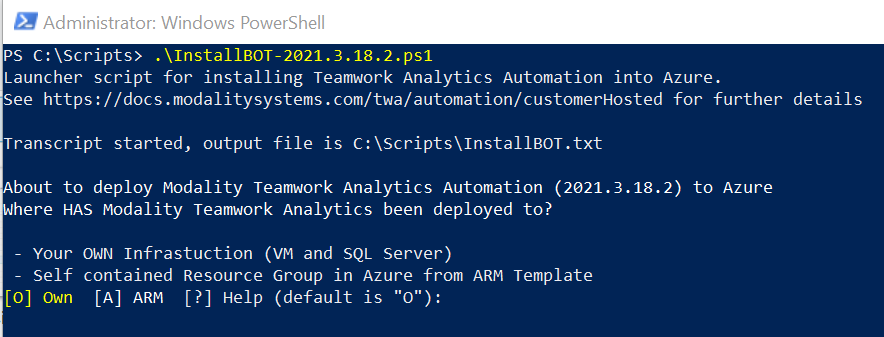
Enter O if Teamwork Analytics has been deployed to the Windows machine that the script is being run from, or A if Teamwork Analytics has been deployed to Azure.
Once you have made your selection enter the information as prompted, all selections are saved to a parametersFile.json file that will be read the next time the script is run so as to make upgrades easier.
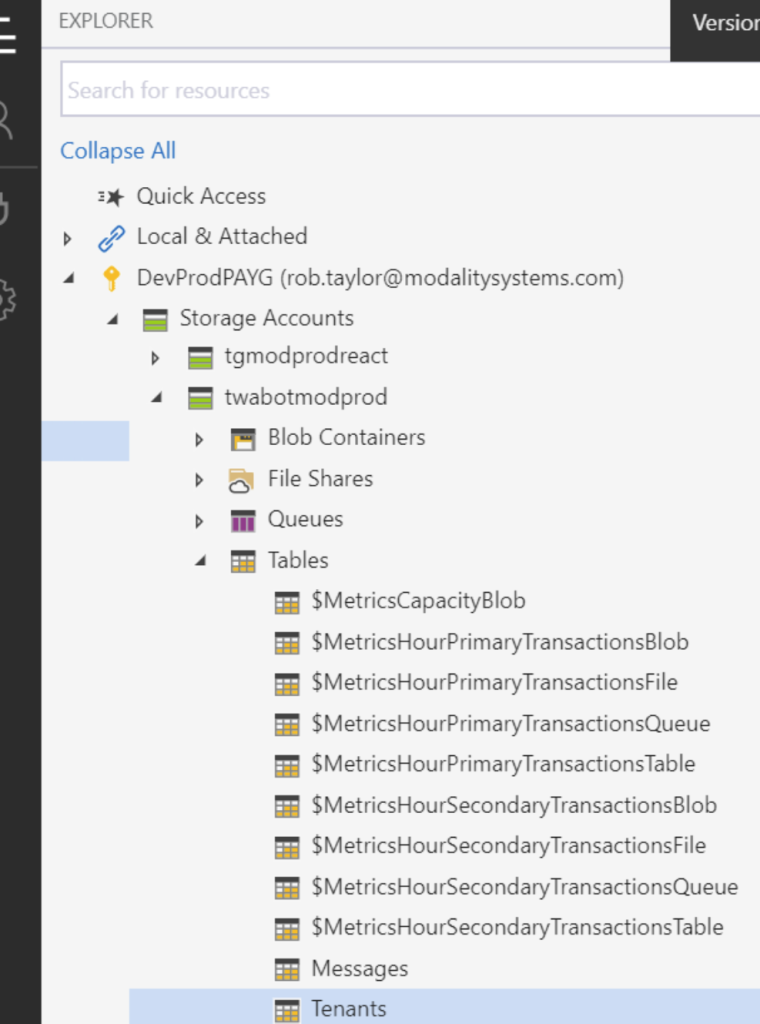
Step 3 Configure Table Storage settings
You will need to have Azure Storage Explorer installed and you must have access to the Teamwork Automation table storage account.
Navigate to the storage account that has been deployed to Azure from within Azure Storage Explorer. This should start “ta”.
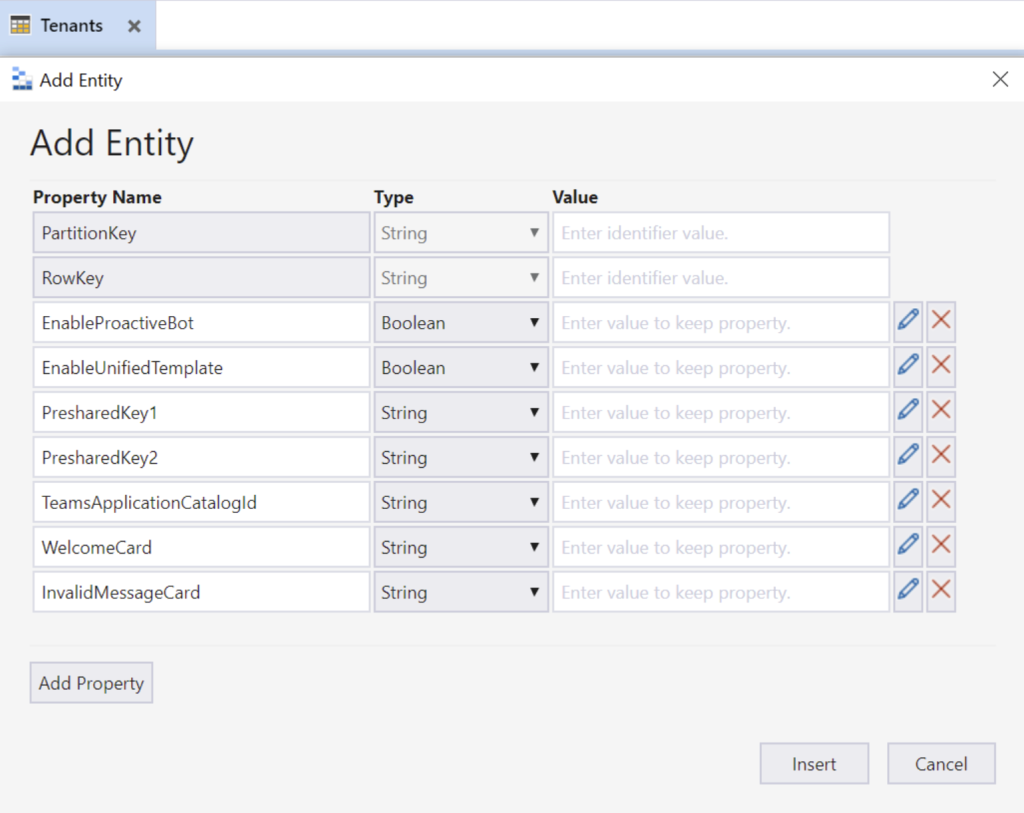
Create a new table called “Tenants”
Create a new row for your tenant, to do this, click the “Add” button in the tool bar and then populate the details in the form that appears. You need to populate the following fields;
Step 4 Install Teamwork Automation App into Teams
The InstallBOT.ps1 script should have created a manifest file called AutomationManifest.zip that points to the newly deployed Teamwork Automation Bot. The manifest should only need to be uploaded to Teams once or if Nasstar / Modality say it needs to be done again.
- From Microsoft Teams go to the Apps section
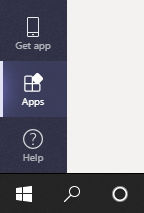
- Then select Upload for [YOUR ORGANISATION NAME]

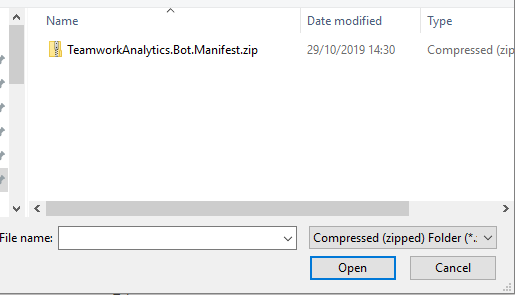
- Then select the downloaded App manifest file zip file
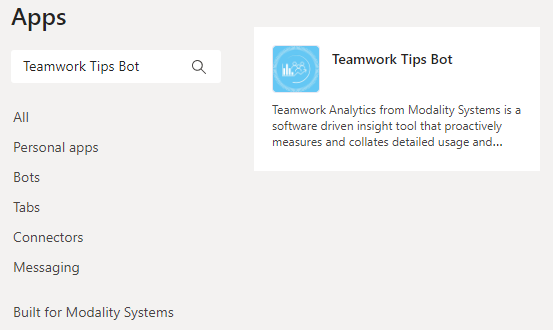
- The App should then appear within your companies Apps section
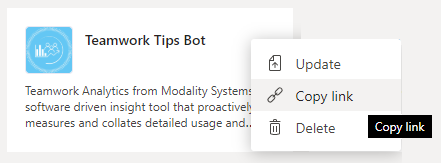
- Once this has been completed, click the “…” button in the top right corner of the app and click Copy link. Provide this link to Nasstar / Modality alongside your Tenant ID as these required for provisioning on the Nasstar / Modality hosted bot platform.
Allow App to be installed within Microsoft Teams
Now that the App has been added to your Microsoft Teams Tenant, your Global policy may need to be adjusted to allow it to be installed by users.
- From the Microsoft Teams Admin Center, under Teams apps click Permission policies
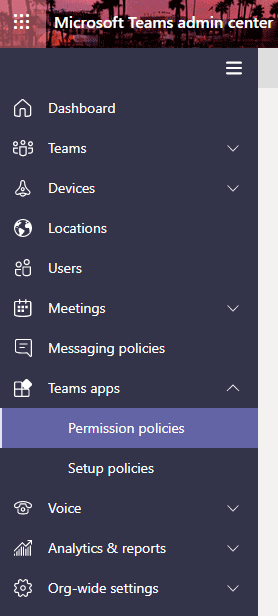
- Click on Global (Org-wide default) (or whatever policy is applied to your organisation)
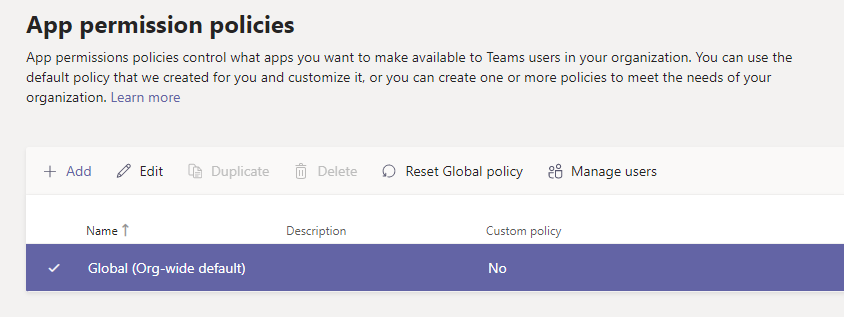
- Make sure the Tenant apps policy is set to Allow all apps
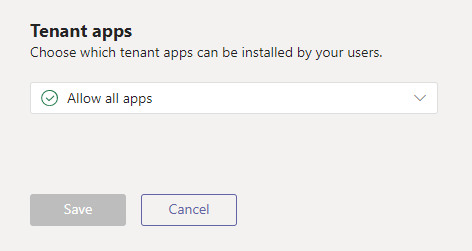
NOTE: You could also specify a list of allowed apps here
NOTE: If app permissions are not set up correctly and ‘Enable Proactive Bot’ is set to true. When sending a user a message, attempting to install the bot will fail and the user will be added to the ‘FailedInstallationUsers’ table. If a user exists in this table, the bot will not attempt to install the app for that user again.
Upgrading
Each time the script is run it will deploy anything that has changed from what is defined in the ARM Template. To perform an upgrade simply run a newer version of the script to the same resource group. If a parametersFile exists in the script folder then this will be read and used for the deployment. However, if there is no parametersFile then you will need to complete all information as prompted.